
Whenever you want cleaner cuts, you can’t rely on the saw alone. You need the blade, the setup, and your own control to work together. Small details like tooth count, hook angle, arbor fit, and speed can make a cut feel smooth or turn it into a noisy mess. Once you see how these parts connect, you’ll know why one blade glides while another fights back.
The Main Factors That Affect Blade Accuracy
Because blade accuracy starts long before the saw turns on, the biggest factors are your marking, blade geometry, tooth setup, material choice, and operating conditions.
You help yourself most while your marking accuracy is clean, because a sharp pencil line, a crow’s foot, or a split line gives you a clear target.
Next, you need a blade with steady geometry, since a well-made edge tracks truer and keeps cuts predictable.
Then your tooth setup matters because the wrong pattern can shake the cut and steal control.
After that, choose blade material that fits your work, so wear doesn’t creep in soon.
Finally, keep machine stability strong with proper alignment, light feed pressure, and calm handling.
Once you stack these habits, you’re not just cutting. You’re fitting in with careful woodworkers everywhere.
Choose the Right Tooth Count
The tooth count you choose sets the pace and feel of your cut, so you need to match it to the job, not just grab the blade that looks closest.
More teeth usually give you a smoother finish, while fewer teeth clear material faster and work better on rough cuts.
Once you know the material and the finish you want, you can pick a tooth count that gives you the right balance of speed and clean edges.
Tooth Count Basics
Choosing the right tooth count can make a saw blade feel almost effortless, or like it’s fighting you every step of the way. With tooth count basics, you steer both speed and smoothness. More teeth usually mean a cleaner edge, while fewer teeth clear waste faster.
So, whenever you care about tooth count and cut quality, consider about the finish you want, not just the speed you crave. You’ll feel more confident whenever the blade matches your task, because the cut starts to cooperate instead of wander. That small shift can save frustration and help you work like you belong at the bench.
Still, don’t chase the highest number every time. Pick the count that fits your cut, and your saw will feel far more friendly.
Material-Specific Counts
A smart blade match can change everything, especially while you’re cutting a material that fights back. You don’t need guesswork here; you need a tooth count that fits the job and keeps you in the crew. For dense stock, abrasive material counts usually rise, so a finer tooth pattern helps the blade stay engaged without grabbing. On softer sheet goods, fewer teeth can move faster and still feel steady.
| Material | Tooth Count |
|---|---|
| Melamine | High |
| Plywood | Medium-high |
| Hardwood | Medium |
| Fiberglass | Very high |
When you work with tricky laminates, specialty laminate blades give you a cleaner path and less edge tear. So match the count to the surface, and your saw starts feeling like it belongs in your hands.
Cut Quality Balance
Whenever you pick the right tooth count, you’re not just chasing a cleaner edge, you’re also protecting the whole cut from rough chatter and wasted effort. You join a crew of makers who want the saw to do its job with less drama and more honor.
More teeth usually give you a smoother surface finish and steadier cut consistency, especially on crosscuts and trim work. Fewer teeth move faster, but they can leave a rougher track.
- Choose high tooth counts for fine work.
- Choose lower counts for faster rip cuts.
- Match the blade to the material.
- Watch heat, vibration, and feed pressure.
Whenever you balance speed and smoothness, your saw feels easier to trust, and your work starts looking like it belongs in the room.
Match Tooth Geometry to the Material
You’ll get cleaner cuts when you match the tooth shape to the material, because each blade geometry handles wood, plastic, or metal a little differently. A fine ATB tooth can leave smooth edges in trim work, while a flatter or tougher geometry helps you move through dense stock with less trouble. When you choose the right tooth form, you make the saw work with the material instead of fighting it.
Tooth Shape Selection
Tooth shape matters just as much as tooth count, because the wrong profile can make even a sharp blade struggle with the material. You’re not guessing here; you’re choosing a partner for the cut.
- Use a tooth profile comparison to match the cut you want with the blade’s bite.
- Pick rounded or hooked shapes whenever you need smoother entry and less grabbing.
- Choose flatter shapes whenever you want control and cleaner tracking.
- Watch gullet capacity effects, because small gullets clog fast and slow your pace.
Whenever you compare shapes, you’ll feel the difference in how the blade clears chips and stays calm. That matters because a steady blade helps you work with confidence, not frustration. So trust the profile, keep your setup simple, and let the blade do its job without fighting you.
Material-Specific Geometry
Blade shape only gets you part of the way, because the material you’re cutting decides how that shape should be tuned. Whenever you pick the right tooth geometry, you feel more in control, and the cut feels like a shared win. For soft wood, use a high tooth count and sharp angles. For dense hardwood, choose stronger bevels that hold up under pressure. For metal, carbide or diamond tips help you stay steady. For abrasive material geometry, a tougher tooth profile slows wear.
| Material | Best Geometry |
|---|---|
| Soft wood | Fine ATB |
| Hardwood | Stronger bevel |
| Metal | Carbide tips |
| Tile | Diamond edge |
Keep thermal distortion limits in mind, because heat can warp accuracy fast. Whenever you match geometry to the job, you cut cleaner and belong to the craft more fully.
Use the Correct Blade Thickness
Whenever you pick the right blade thickness, your saw cuts cleaner and feels easier to control. You also protect your work via matching kerf width to the cut you need, so the blade removes just enough material. A thinner blade can save effort, while a thicker one adds blade stiffness for steadier cuts in tougher stock.
- Choose thin blades for smooth, fine work.
- Pick thicker blades whenever you need extra support.
- Match thickness to the material, not the mood.
- Let the cut feel natural, not forced.
Whenever you choose well, you fit in with the craft, and your tools work with you, not against you. That small choice can turn a rough cut into one that feels calm, clean, and right.
Check Blade Diameter and Arbor Fit
When you check the blade diameter and arbor fit, you save yourself from a lot of frustration before the saw even starts. You want diameter compatibility that matches your saw’s guard, table, and speed range, because a blade that’s too large or too small can throw off your setup.
Next, confirm arbor sizing so the hole sits snugly on the shaft without play. That fit helps you feel part of a tool setup that works with you, not against you. If the blade slips, even a little, your cuts can suffer and your confidence can too.
Keep Blade Runout and Wobble Low
You should check runout initially, because even a small wobble can throw off your cut and make the blade feel shaky. Use a simple gauge or a careful test cut to spot the problem, then look for a loose arbor, dirt on the flange, or a blade that isn’t seated flat. Once you find the cause, you can tighten the setup and reduce wobble so your saw cuts cleaner and feels steadier.
Runout Measurement Checks
How do you keep a saw blade cutting straight instead of wandering? You check runout before the cut, because a tiny offset can make the blade feel nervous in your hands. Start with a dial indicator setup against the teeth or rim, then rotate the blade slowly and record the peak movement. Next, do an arbor flange inspection, since dirt, dents, or wear can nudge the blade off center.
- Zero the gauge carefully.
- Spin the blade by hand.
- Record the highest and lowest points.
- Repeat after reinstalling the blade.
When you measure the same way each time, you build trust in your saw and in your own work. That calm confidence helps you stay in the groove, with less guesswork and better cuts.
Wobble Reduction Methods
A steady blade starts with a steady setup, and even a small wobble can throw off a cut faster than most people expect. You can keep things calm through checking blade stabilization initially, because a snug arbor and clean mounting faces stop side play before it starts.
Then inspect bearing maintenance, since worn bearings let the blade drift and shake like it has somewhere else to be. Tighten the saw parts in order, and use the right blade for the job so the teeth stay balanced under load.
Also, keep the blade clean, because pitch and dust add drag and invite wobble. Finally, test a short cut after each change. That quick check helps you stay in control and feel like you belong at the bench.
Pick the Best Tooth Hook Angle
When you’re picking the best tooth hook angle, the right choice can make the whole cut feel easier and cleaner. You want hook angle basics that match your material and your comfort level, because the angle changes how the tooth grabs. That’s where tooth rake tradeoffs matter.
- Positive hook pulls harder and cuts fast in soft wood.
- Neutral hook feels steadier and helps you stay in control.
- Negative hook reduces grabbing on trim, molding, and other delicate work.
- Match the angle to the job, so you and your saw work as a team.
If the blade feels jumpy, ease up on the hook. If it feels sluggish, a stronger hook may help. You’re not guessing here. You’re choosing the angle that lets your cut glide with less strain and more confidence.
Control Blade Speed and Feed Rate
A steady blade speed and a calm feed rate can turn a rough cut into a clean one. You stay in control whenever you match the blade to the material and keep your hands relaxed.
Too much speed can burn the work, while too little can cause drag and chatter. So, watch speed stability and keep feed consistency from start to finish.
Start with light pressure, then let the blade do the work. Whenever the saw begins to strain, ease back a bit. Whenever it feels sluggish, adjust before the cut drifts.
You don’t need perfection, just steady rhythm and attention. That’s how you cut with confidence and feel at home at the saw.
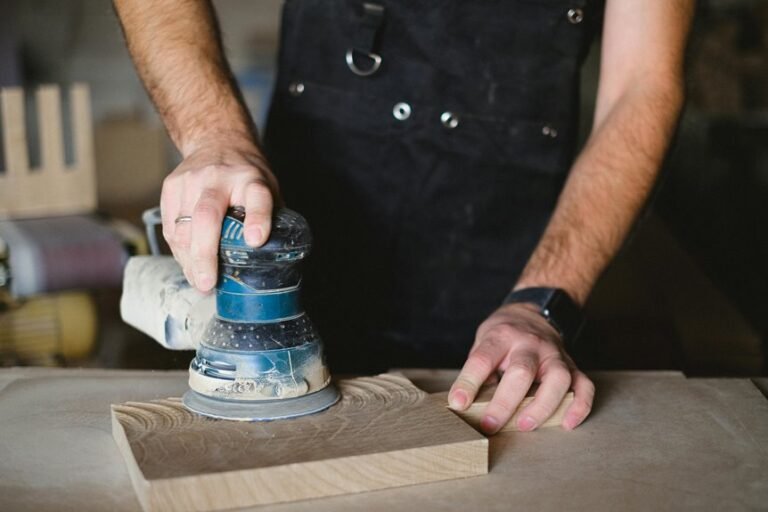
Use Sharp, Clean Saw Teeth
Sharp, clean saw teeth make the cut feel smoother and far more manageable. You can trust your saw more whenever each tooth grabs wood evenly instead of scraping. That’s why tooth cleaning and edge maintenance matter so much.
Dust, resin, and tiny chips clog the teeth, and that build-up steals accuracy. Keep your routine simple:
- Brush teeth after each use.
- Wipe resin with a safe cleaner.
- Check edges for dull spots.
- Store the blade dry and covered.
Whenever you stay on top of cleaning, you help the blade stay crisp and ready for the next job. You also join the group of woodworkers who get neat results without extra struggle. Small habits here save you from rough cuts later.
Reduce Vibration During Cutting
Vibration can turn a good cut into a frustrating one fast, but you can calm it down with the right setup and habits.
You belong to the group that wants clean edges, so start by locking the workpiece tight and checking that the blade is true. A balanced blade and the right speed help cut chatter before it grows. Next, use vibration damping where your saw allows, because it steadies the cut and keeps the teeth engaged. Also, add anti vibration mounts under the machine whenever you can. Then feed the material smoothly, without forcing it. As soon as you let the saw do the work, you get less shake, less tearout, and more control. That steady feel makes every cut easier.
Frequently Asked Questions
How Does Pencil Line Width Affect Cut Precision?
A pencil line is a narrow target, and following its center improves cut accuracy. Thinner lines reduce width variation, sharpen mark alignment, and help you cut where you meant to.
What Blade Coatings Reduce Heat During Cutting?
You’ll want coating materials like TiCo™ or Perma-Shield™, because they reduce friction and heat buildup, helping you get more consistent cuts. You’re choosing smoother cutting, longer blade life, and less burn.
How Often Should Blade Symmetry Be Inspected?
Inspect blade symmetry every 8 to 12 hours. Check inspection intervals and blade wear patterns closely so you can keep cuts safe and precise.
Why Does Thermal Distortion Change Cut Accuracy?
Thermal distortion reduces cut accuracy because heat causes the blade to expand and bend, which shifts its cutting path. It can also warp the workpiece through thermal stress, making the cut drift. Keeping temperatures low and feed rates steady helps maintain accuracy.
What Marking Method Best Identifies the Exact Cut Point?
Use a sharp scribe mark, with a center punch mark if needed, to pinpoint the cut. It gives you a clear reference so the cut stays accurate every time.