The first time a snug socket saved a stubborn bolt from rounding, it felt like finding the right key in a dark garage. You can get that same clean bite whenever you match socket fit, drive size, depth, and type to the fastener, then apply torque with care. Whenever you’ve ever fought a slippery lug or a warped part, the next few choices can spare you that headache and perhaps your knuckles, too.
How Socket Fit Affects Fasteners
Whenever a socket fits a fastener the right way, it does more than just turn the nut or bolt, because it grips the head evenly and helps protect both the fastener and your tool. You feel the difference fast. A snug socket gives you steady control, so the corners stay sharp and the job feels less slippery and stressful.
Unless the fit is loose, the socket can rock, round the edges, and make removal harder. That’s why you should check for clean contact before you push hard. During corrosion inspection, you can spot rusted heads and choose a socket that still bites well. Good rust prevention also matters, since clean, dry parts hold their shape better.
Whenever you work with the right fit, you join a crew that values care, safety, and solid results.
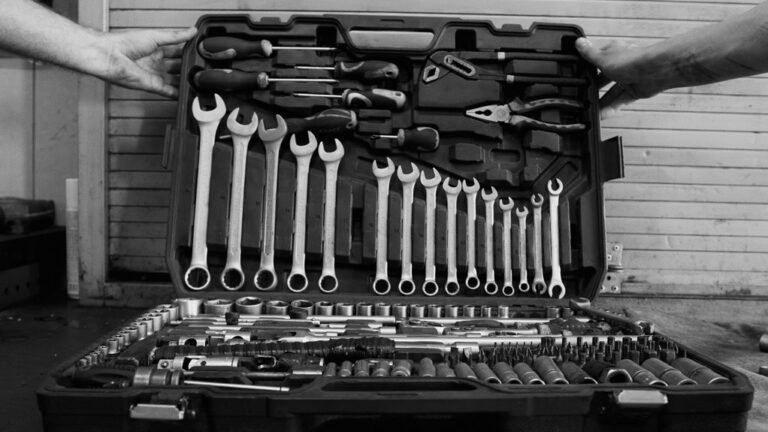
Choose the Right Socket Set Size
Choosing the right socket set size saves you time, protects your fasteners, and keeps the whole job from turning into a knuckle-busting mess.
When you’re sorting socket set sizes, start with the jobs you tackle most. A smaller kit can cover light repairs, while a broader set gives you more room to work without hunting for a fit.
As you’re selecting socket range, look for the common metric and imperial sizes that match your tools and projects. That way, you’ll feel ready whether you’re fixing a bike, working on a car, or helping a neighbor in the garage.
Also, choose a set that stores neatly and reads clearly. Then you’ll spend less time guessing and more time getting things done with confidence.
How Drive Size Affects Torque
Drive size plays a big role in how much torque you can apply, because the square end of the socket and the ratchet has to handle the force together without flexing or slipping.
When you pick a smaller drive, you get better control for lighter jobs, but the drive size impact shows up fast if you push too hard.
Larger drives give you more strength, so they fit the torque capacity ranges needed for stubborn bolts and heavier work.
That means you can work with more confidence and less worry about rounding or tool strain.
In your shop, the right drive helps you stay steady, feel supported, and keep each turn smooth.
Match Socket Types to Bolt Heads
A good drive size helps, but the socket still has to match the bolt head, or the job gets messy fast. You want the right shape, because that’s what keeps you steady and confident. Whenever you use hex head compatibility, a 6-point socket hugs the flats and helps you avoid rounded corners. For odd fasteners, spline head matching can give you a firmer feel and a better grip.
- You save time and stress.
- You feel like you belong on the job.
- You protect the fastener from slip damage.
- You finish with cleaner, safer work.
Why Socket Depth Changes Grip
As the socket reaches deeper around the fastener, it can grab more of the nut or bolt head, and that extra contact often gives you a steadier hold. You feel that support most with deep well sockets, which wrap farther down the sides and give the tool more surface to work with.
That deeper reach can help whenever the fastener sits inside a recess or near other parts. Still, shallow socket clearance matters whenever space is tight, because a shorter socket can fit where a deep one won’t. You’re not choosing between good and bad here, just between reach and room. Whenever you match depth to the job, you work with more confidence, and the socket feels like part of your hand.
How to Prevent Rounding Bolts
What stops a bolt from rounding so fast? You do, by choosing the right socket and keeping it seated. A snug 6-point socket grips the flats better, so you’re less likely to chew the corners. Clean the head first, then add bolt head lubrication for easier turn-in and rusted fastener removal. If the bolt feels stuck, stop and reseat the socket before you push harder.
That small pause saves a lot of grief.
- You keep control.
- You protect the part.
- You save time.
- You feel like the person who can fix it.
Use steady pressure and let the fit do the work. When you move with care, you join the crew that gets the job done right, without turning a simple repair into a sad little smooth circle.
How to Use a Torque Wrench
Once you’ve kept the bolt from rounding, you can tighten it the right way with a torque wrench and avoid the guesswork that causes real damage. You belong in the group of people who want a clean, confident finish. First, fit the socket firmly, then set the wrench to the right value and hold it straight. As you pull, keep a smooth pace until the tool clicks or signals. That click is your stop sign.
| Step | What you do | Why it matters |
|---|---|---|
| 1 | Check fit | Keeps grip solid |
| 2 | Set value | Guides force |
| 3 | Align tool | Reduces strain |
| 4 | Pull evenly | Improves accuracy |
| 5 | Stop at click | Protects parts |
Good torque wrench usage builds trust in your work, and steady torque wrench technique helps every fastener feel cared for.
Torque Specs for Common Repairs
When you use a torque wrench on common repairs, you help each fastener get just the right hold without damage.
On lug nuts, an oil drain plug, and spark plugs, the correct torque keeps parts secure and makes the job feel a lot smoother.
Next, you’ll see how these specs guide your socket choice and help you work with more confidence.
Lug Nut Tightening
Precision matters most as you tighten lug nuts, because the right torque keeps your wheels secure without stressing the hardware. You’ll feel more confident once you follow lug nut patterns and use wheel torque checks with a torque wrench.
Start by snugging each nut in a star pattern, then bring them down evenly. That way, you stay in the same team as other careful drivers.
- You protect your wheels.
- You avoid shaky rides.
- You save your studs.
- You keep your trust strong.
Set the tool to the maker’s spec, then recheck after a short drive. Should one nut feel off, pause and fix it. Small steps like these help you belong on the road with people who care about safety.
Oil Drain Plug
How do you keep an oil drain plug tight enough to seal, but not so tight that you strip the pan? You use the right socket, a steady hand, and the maker’s torque spec. That small number protects drain plug sealing and supports easy oil pan maintenance.
| Step | Action |
|---|---|
| 1 | Clean the plug and pan threads. |
| 2 | Check the gasket or washer. |
| 3 | Start the plug as hand. |
| 4 | Tighten with a 3/8-inch socket. |
| 5 | Stop at the listed torque. |
If the plug feels rough, back off and realign it. You’re not alone here; lots of DIY folks face this. A snug fit helps the socket grip, so you can finish the job cleanly and keep leaks away.
Spark Plug Torque
Spark plugs only work well when you tighten them just right, because too much force can damage the threads and too little can let them loosen over time. Upon you work on your own car, you join a careful crowd that values doing it right. Use spark plug gap tools before, then set the plug by hand before you reach for the wrench.
Most plugs need only a light final turn to match the maker’s torque specs. That small step protects your engine and your confidence.
- You hear the click and feel sure.
- You avoid stripped heads and sore knuckles.
- You keep ignition system maintenance on track.
- You help your engine stay smooth and calm.
With the right socket fit, you can trust each plug and feel proud of the job.
Avoid Over-Tightening Fasteners
You need to stay within the proper torque limit, because more force doesn’t mean a better hold. Whenever you overtighten fasteners, you can stretch bolts, damage threads, or crack parts that should’ve stayed solid.
A calibrated torque wrench helps you keep your results consistent, so each fastener gets the same careful treatment.
Proper Torque Limits
Whenever you tighten a fastener, the goal isn’t to make it feel “extra secure” but to reach the right torque and stop there. You fit in with crews who trust the numbers, not guesswork. Check torque limit charts, then set your wrench to match the job and respect the fastener load margins built by the maker. That keeps your work calm, clean, and confident.
- You hear the click, and you know you did it right.
- You protect the whole team from sloppy rework.
- You keep parts aligned, so the job moves smoothly.
- You leave with dignity, not doubt.
As you follow the spec, you show skill, care, and respect for the craft.
Damage From Overtightening
Overtightening can turn a simple fastener into a costly mistake fast. When you lean too hard on your socket, you can stretch bolts, crush washers, and warp parts that should stay true. That’s overtightening damage, and it often shows up later as leaks, loosened joints, or cracked hardware.
You could also feel thread galling, where metal tears and binds as you force parts together. To protect your work, tighten only until the joint seats firmly, then stop. Use smooth, controlled pressure so you keep the fastener healthy and the fit secure.
Provided a part feels rough or fights back, ease off and check it before you push harder. You’re not being timid, you’re building it right, and that’s how your gear stays dependable.
Calibration And Consistency
A well-calibrated torque wrench can save your fasteners from a hard life. As you follow calibration standards, you keep every turn honest and protect the parts you care about. You also build trust in your work, because the next bolt feels just like the last one.
Run consistency checks before each job, and you’ll spot drift ahead of time.
- You feel calmer.
- Your gear lasts longer.
- Your hands stay steady.
- Your team counts on you.
If the wrench slips out of spec, reset it before you tighten again. That small habit keeps you in the group that gets clean, safe results.
With steady calibration, you avoid over-tightening and help every fastener hold firm without a fight.
How to Spot Worn Sockets
Even a good socket won’t stay reliable forever, so you should know the small signs that it’s wearing out before it starts causing trouble.
Check for replacement indicators like rounded corners, wobble on the fastener, or a sloppy feel on the drive tool. Those clues usually show the socket no longer grips as it should.
Next, look for surface wear inside and out. Shiny scraped spots, cracks, rust pits, or chipped edges can weaken the fit and raise stripping risk.
If the socket slips during normal hand force, don’t shrug it off. You want your set to feel like part of your crew, not a gamble.
When the fit gets loose or the metal looks tired, swap it out and keep your work steady, safe, and confident.
Metric vs. SAE Socket Sets
Metric and SAE socket sets can look almost the same at first sight, but they solve different fastening problems, so choosing the right one saves you time and a lot of grip-related frustration. You’ll feel more confident whenever you read the head size instead of guessing. Metric measurements use millimeters, while SAE markings use inches, so mixing them can leave you with a sloppy fit. That tiny slip can make you feel left out of your own repair job.
- You match faster whenever the label makes sense.
- You avoid rounded corners and wasted effort.
- You share tools easier with your crew.
- You keep stubborn bolts from winning.
Whenever you work on newer imports, metric usually fits best.
Whenever you handle older domestic gear, SAE often belongs in your tray.
Choose Impact Sockets for Power Tools
When you use power tools, you need sockets that can take the hit, and impact sockets do that job with far more confidence than standard chrome ones. You’ll feel the difference because their impact resistance helps them flex under hammering force instead of cracking.
That means your driver can work harder while you stay in control. Next, check tool compatibility, since the socket must match the drive size on your impact wrench or ratchet. A 1/2-inch drive often fits common jobs, while smaller drives suit lighter tasks.
Also, choose a 6-point shape whenever you want a firmer grip on stubborn fasteners. With the right match, you’ll tighten or loosen parts more smoothly, and you’ll work like you belong on the crew.
How to Store Socket Sets Properly
Before you put your socket set away, wipe each piece clean so dirt, oil, and grit don’t cause rust or make the tools harder to grab later.
Then place every socket back in its marked spot in the case so you can find the right size fast and keep the set complete.
A little order now saves you the headache of hunting for that one missing 10 mm later.
Clean Before Storage
A clean socket set lasts longer and works better, so wipe each socket and drive tool after use to remove grease, dirt, metal shavings, and moisture. You’re not just doing chores; you’re protecting the team gear you trust. Use a dry cloth initially, then a little cleaner for cleaning grease from sockets. Check the square drive and inside walls, too. Should you spot orange marks, keep going with removing rust before storage so corrosion doesn’t spread.
- You save time next time.
- You keep your grip confident.
- You help the set feel cared for.
- You fit in with folks who look after their tools.
Let the pieces air-dry fully. Then store them only once they feel cool, dry, and ready.
Organized Case Placement
Case logic starts here. Place each socket back in its marked slot so the set stays easy to scan and simple to use next time. When you sort through drive size and type, you cut search time and keep your workflow calm. Use foam lined trays to hold each piece snugly, then check labeled compartment maps before you close the lid.
That small habit helps you notice missing sizes fast, so you’re not stuck guessing on the job. Keep the ratchet, extensions, and adapters together, because matched groups feel ready when you do. Also, store clean, dry sockets in the same order every time. That consistency builds trust in your kit, and your hands will thank you later, even on busy days whenever every second counts.
Build the Best Socket Set for Your Work
As you build the right socket set for your work, every job gets easier, safer, and a lot less frustrating. Start with socket set materials that match your tasks, like chrome vanadium for daily use or impact steel for tough jobs. Choose a portable socket kit so you move between sites, so you can stay ready and feel like part of a crew that always has your back.
- Pick 3/8-inch drives for most repairs.
- Add 1/4-inch sockets for fine work.
- Keep 1/2-inch pieces for bigger torque.
- Include metric and imperial sizes for comfort.
Next, choose 6-point sockets for a tighter grip and fewer slips. Then add extensions and a torque wrench, because clean fit and steady force help you work with confidence.
As your set fits your hands and your work, you’ll notice the difference right away.
Frequently Asked Questions
How Do I Know if a Socket Is Damaged Before Use?
Do a quick visual inspection: look for cracks, rounded corners, rust, or deformation. Check wear indicators as well. If the socket wobbles, slips, or feels rough, do not use it.
Can Socket Extensions Reduce Torque Transfer Significantly?
Yes, socket extensions can reduce torque transfer somewhat, especially as the extension gets longer, but the loss is usually small if the setup stays straight and secure and you use well made tools with steady pressure.
Which Socket Materials Resist Corrosion Best?
Stainless steel offers the strongest corrosion resistance, while chrome plating adds another layer of protection against rust and wear. These materials help tools stay clean, durable, and dependable in damp, demanding conditions.
Are Insulated Sockets Safe for All Electrical Voltages?
No, you should not assume insulated sockets are safe for every voltage. Check the voltage rating and the latest insulation test results before use. Use tools rated for the specific electrical job you are doing.
What Causes Sockets to Stick on Fasteners?
Sockets can stick when corrosion roughens the fastener, worn heads lose their shape, or dirt changes the fit. Using the wrong size, applying too much force, or working with a damaged socket can also make it seize.